Floor Refinishing
Is your hardwood floor looking dull, scratched, or worn out? At Lifetime Home Services, we specialize in professional hardwood floor refinishing that restores the natural beauty and shine of your wood—without the cost of full replacement.
Bring Your Floors Back to Life with Expert Hardwood Refinishing

HARDWOOD FLOOR REFINISHING
Hardwood flooring is one of the only floorings that can be refinished and brought back to its former beauty. The floor can be refinished and a new coat is added to give it the look it had when it was first installed. We are experienced and trained in these processes and are able to provide a beautiful high quality finished product.
Things you will see changed on your floor:
Cracks filled in
Sheen restored and even
Scratches removed
Grime is removed
Pet stains are removed
Smooth & new look floor
SANDING & REFINISHING
Bring your floors back to life in as little as 1 day!
Floor refinishing can completely transform the look and feel of your home. With a wide range of stain and polyurethane options, we can either refresh your existing wood floors or give them a whole new style. Our team will guide you through the best stain colors and finish types to help you choose the perfect look for your space.
We use state-of-the-art dustless sanding machines to ensure the process is as clean and smooth as possible—leaving little to no dust behind. Plus, we seal and protect all doorways with plastic sheeting to keep the dust fully contained in the work area.


DURABLE AND SAME-DAY FINISH
To make the process even faster, we use non-toxic, low or no VOC water based stain and infrared curing lamps that dramatically reduce drying time — allowing you to walk on your beautifully refinished floors after 24 hours.
— no waiting, no downtime. With Lifetime Flooring Services, your wood surfaces can be beautifully transformed in just days, not weeks.
Floor Refinishing Process
Step 1 - Inspection & Prep
Evaluate the condition of the floor (deep scratches, stains, warped boards). Remove all furniture, rugs, and baseboard trims if needed. Clean the floor thoroughly to remove dust and debris.
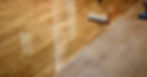
Step 2 - Sanding
Use industrial-grade sanding machines to remove the old finish and a thin layer of wood. Progressively finer grits are used to smooth the surface. Edge sanders or hand-sanding tools are used for corners and tight spaces.
Step 3 - Repairs
Replace or patch damaged boards. Fill in gaps, cracks, or holes with wood filler. Ensure the surface is level and consistent.
Step 4 - Cleaning & Dust Removal
Vacuum and tack-cloth the floor to eliminate all dust particles. Some companies use dustless sanding systems for a cleaner process.
Step 5 - Staining
If a color change is desired, water based stain is applied evenly and allowed to dry. Multiple shades available to match design preferences.
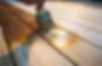
Step 6 - Finishing
Apply 2–3 coats of polyurethane or another protective finish. Choose between matte, satin, semi-gloss, or high-gloss finishes. Allow proper drying and curing time between coats (infrared curing).


